
Pushing composed images to Azure
Weldr aka. Composer can generate images suitable for uploading to the Azure cloud, and running an instance there. The images have the right format, and include the necessary agents, as well as cloud-init.
Prerequisites
We’ll use Fedora 29 as our OS of choice for running this. Run this in its own VM with at least 8 gigabytes of memory and 40 gigabytes of disk space. Lorax makes some changes to the operating system its running on.
First install Composer:
$ sudo yum install lorax-composer cockpit-composer cockpit composer-cli
Next make sure to turn off SELinux on the system. Lorax doesn’t yet work properly with SELinux running, as it installs an entire OS image in an alternate directory:
$ sudo setenforce 0
$ sudo sed -i 's/^SELINUX=.*/SELINUX=permissive/' /etc/selinux/config
Now start lorax-composer system service:
$ sudo systemctl enable --now lorax-composer.socket
If you’re going to use Cockpit UI to drive Composer (see below), you can also enable it like this:
$ sudo systemctl enable --now cockpit.socket
$ sudo firewall-cmd --add-service=cockpit && firewall-cmd --add-service=cockpit --permanent
Install the Azure CLI tooling:
$ sudo rpm --import https://packages.microsoft.com/keys/microsoft.asc
$ sudo sh -c 'echo -e "[azure-cli]\nname=Azure CLI\nbaseurl=https://packages.microsoft.com/yumrepos/azure-cli\nenabled=1\ngpgcheck=1\ngpgkey=https://packages.microsoft.com/keys/microsoft.asc" > /etc/yum.repos.d/azure-cli.repo'
$ sudo yum install azure-cli
Now log into the Azure CLI like so:
$ az login
To sign in, use a web browser to open the page
https://microsoft.com/devicelogin and enter the code XXXXXXXXX to authenticate.
...
Make sure you have an appropriate resource group created in Azure. The one I’m using
is called composer. Make sure you also have an appropriate storage account
created in Azure. The one I’m using is called composerredhat. Next list the keys
for that storage account:
$ GROUP=composer
$ ACCOUNT=composerredhat
$ az storage account keys list --resource-group $GROUP --account-name $ACCOUNT
Make note of "key1" in the above output, and assign it to an environment variable:
$ KEY1=....................
Lastly create an appropriate storage container:
$ CONTAINER=composerredhat
$ az storage container create --account-name $ACCOUNT --account-key $KEY1 --name $CONTAINER
Compose an image from the UI
To compose an image in Composer, log into the Cockpit Web Console with your web browser.
It’s running on port 9090 on the VM that you’re running Composer in. Use any admin
or root Linux system credentials to log in. Select the Image Builder tab.
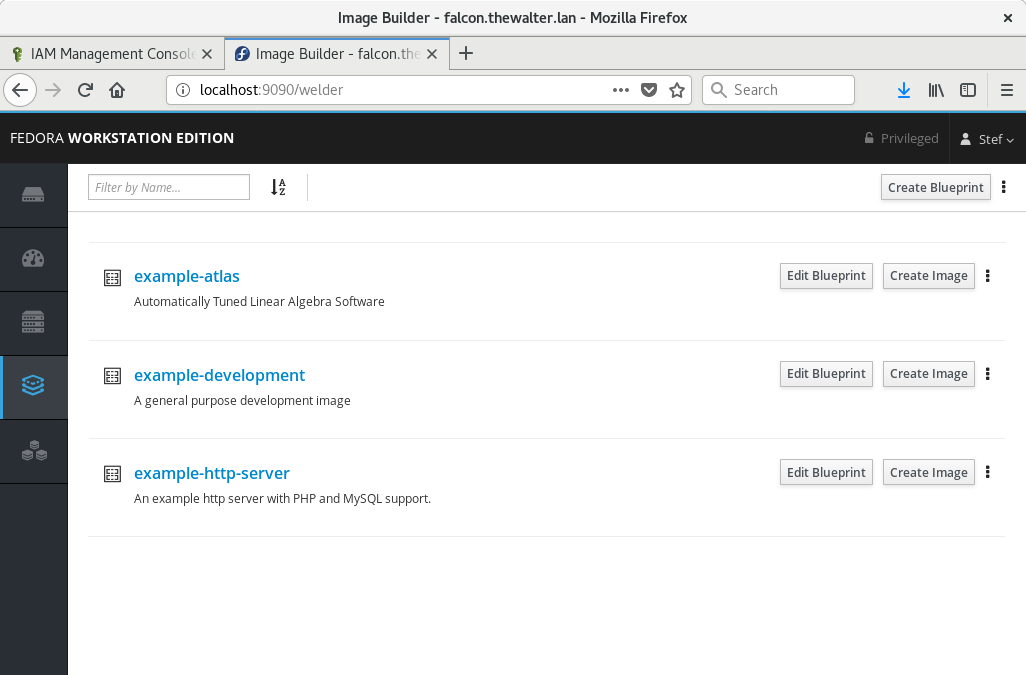
We first have to have a blueprint defined. This blueprint describes what goes into the image.
For the purposes of this example we’ll use the example-http-server blueprint, which
builds an image that contains a basic HTTP server.
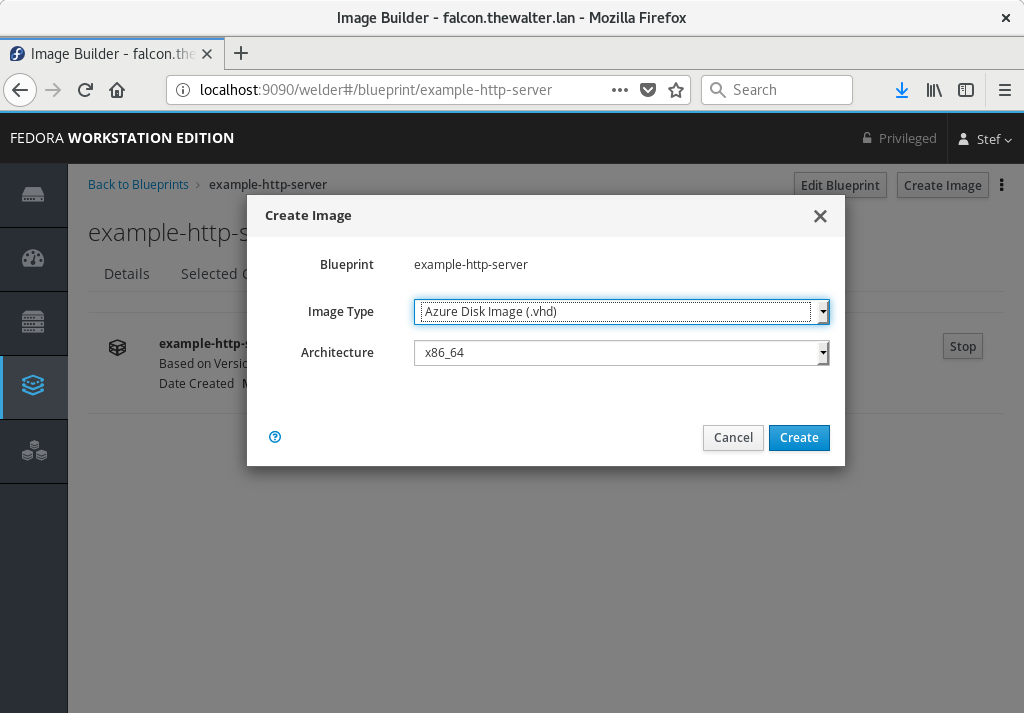
Click on the Create Image button and choose Azure from the dropdown to choose the Image Type:
If you click on the blueprint, you should see progress described on the Images tab:
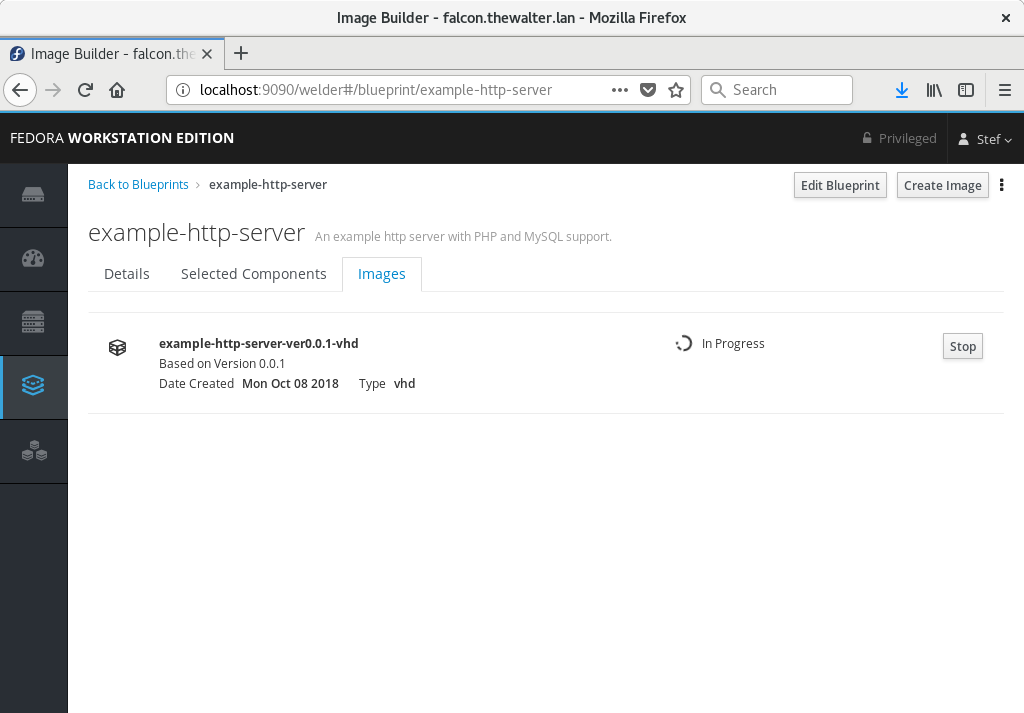
Once it’s done, download the image.
Compose an image from the CLI
To compose an image in Composer from the command line, we first have to have a blueprint
defined. This blueprint describes what goes into the image. For the purposes of this
example we’ll use the example-http-server blueprint, which builds an image that
contains a basic HTTP server.
We run the following command to start a compose. Notice that we pass the image type
of vhd which indicates we want an image appropriate for pushing to
Azure in the Virtual Hard Disk format.
$ sudo composer-cli compose start example-http-server vhd
Compose 25ccb8dd-3872-477f-9e3d-c2970cd4bbaf added to the queue
Now check the status of the compose like this:
$ sudo composer-cli compose status
25ccb8dd-3872-477f-9e3d-c2970cd4bbaf RUNNING  Mon Oct  8 09:45:52 2018 example-http-server 0.0.1 vhd
In order to diagnose a failure or look for more detailed progress, see:
$ sudo journalctl -fu lorax-composer
...
When it’s done you can download the resulting image into the current directory:
$ sudo composer-cli compose image 25ccb8dd-3872-477f-9e3d-c2970cd4bbaf
25ccb8dd-3872-477f-9e3d-c2970cd4bbaf-disk.vhd: 4460.00 MB
Pushing and using the image
So now you have an image created by Composer, and sitting in the current working directory. Here’s how you push it to Azure and create an instance from it:
$ VHD=25ccb8dd-3872-477f-9e3d-c2970cd4bbaf-disk.vhd
$ az storage blob upload --account-name $ACCOUNT --container-name $CONTAINER --file $VHD --name $VHD --type page
Alive[#####                                                           ]  9.1480%
...
Once the upload to the Azure BLOB completes, we can create an Azure image from it:
$ az image create --resource-group $GROUP --name $VHD --os-type linux --location eastus --source https://$ACCOUNT.blob.core.windows.net/$CONTAINER/$VHD
 - Running ...
Next create an instance either with the Azure portal, or a command similar to the following:
$ az vm create --resource-group $GROUP --location eastus --name $VHD --image $VHD --admin-username azure-user --generate-ssh-keys
 - Running ...
Use your private key via SSH to access the resulting instance as usual. The user to log
in as is azure-user