
Using Composer on RHEL
Weldr aka. Composer can generate custom images suitable for deploying systems, or as images ready to upload the cloud. It works great on Fedora, but on Red Hat Enterpise Linux there’s an additional wrinkle.
Composer uses Anaconda and Lorax tooling to prepare these images, much like Red Hat prepares it’s own distributed images. However neither Anaconda nor Lorax can read from Red Hat’s content distribution network, and so have a hard time working with the sources of RPM content available.
This is an embarrassing gap, that we’re working to fix. In the meantime, here’s how to
use the reposync tooling to work around it. We’re going to mirror the Red Hat
repositories locally and use that as a source of content for Composer.
Prerequisites
We’ll use RHEL 7.5 as our version of Red Hat Enterprise Linux for running this document. Make sure to have at least 50 gigabytes of disk space to run this. Due to the way Lorax works it make changes to the operating system its running on, so don’t use this system for other tasks:
Make sure your system is subscribed:
$ sudo subscription-manager status
+-------------------------------------------+
   System Status Details
+-------------------------------------------+
Overall Status: Current
If necessary run a command like the following to subscribe the system:
$ sudo subscription-manager --auto-attach register
Username: example@email.com
Password:
The system has been registered with ID: cca2f23d-6167-4df1-b149-5a0ca1866d53
The registered system name is: m1.example.lan
Product Name: Red Hat Enterprise Linux Server
Status:       Subscribed
Make sure you have enough disk space mounted at /var/www which is where our mirror will live:
$ df -h /var/www/
Filesystem      Size  Used Avail Use% Mounted on
/dev/sda         99G   61M   94G   1% /var/www
Mirror the required repositories
Now we install the necessary mirroring tools itself:
$ sudo yum install yum-utils createrepo httpd
Now lets look at the identifiers of the repositiories we’re going to mirror:
$ sudo yum repolist
Loaded plugins: product-id, search-disabled-repos, subscription-manager
repo id                           repo name                               status
rhel-7-server-rpms/7Server/x86_64 Red Hat Enterprise Linux 7 Server (RPMs 21,082
repolist: 26,341
For each repository you want to mirror use the following command. Notice how we specify the repository identifier as the argument to the commands:
$ sudo mkdir -p /var/www/html
$ sudo reposync --gpgcheck -l --download_path=/var/www/html --repoid rhel-7-server-rpms --downloadcomps --download-metadata
$ cd /var/www/html/rhel-7-server-rpms
$ createrepo -v /var/www/html/rhel-7-server-rpms -g comps.xml
Make sure the repos have the correct SELinux context so that httpd (Apache) can access the files that have been mirrored, and start up the web server:
$ chcon -vR -t httpd_sys_content_t /var/www/html/
$ systemctl start httpd
Configure Composer to use the mirrors
Now we install the Composer itself:
$ sudo yum install lorax-composer cockpit-composer cockpit composer-cli
Next make sure to turn off SELinux on the system. Lorax doesn’t yet work properly with SELinux running, as it installs an entire OS image in an alternate directory:
$ sudo setenforce 0
$ sudo sed -i 's/^SELINUX=.*/SELINUX=permissive/' /etc/selinux/config
Place an repository config in /etc/yum.repos.d to point to the content you’ve
mirrored above. Make sure to include the IP address or hostname of the system you’ve
mirrored the content onto.
$ sudo cat > /etc/yum.repos.d/mirror.repo <<EOF
[mirror-rhel-7-server-rpms]
name=Red Hat Enterprise Linux 7 Server
baseurl=http://<ip_address>/cdrom/
enabled=1
gpgcheck=1
gpgkey=file:///etc/pki/rpm-gpg/RPM-GPG-KEY-redhat-release
EOF
Now verify the client configuration:
$ sudo yum clean all
$ sudo yum repolist
If you’re running both the mirror and Composer on the same system, then disable the subscribed repositories like this:
$ sudo yum-config-manager --disable rhel-7-server-rpms
Now enable and start lorax-composer system service:
$ sudo systemctl enable --now lorax-composer.socket
If you’re going to use Cockpit UI to drive Composer (see below), you can also enable it like this:
$ sudo systemctl enable --now cockpit.socket
$ sudo firewall-cmd --add-service=cockpit && firewall-cmd --add-service=cockpit --permanent
Compose an image from the UI
To compose an image in Composer, log into the Cockpit Web Console with your web browser.
It’s running on port 9090 on the VM that you’re running Composer in. Use any admin
or root Linux system credentials to log in. Select the Image Builder tab.
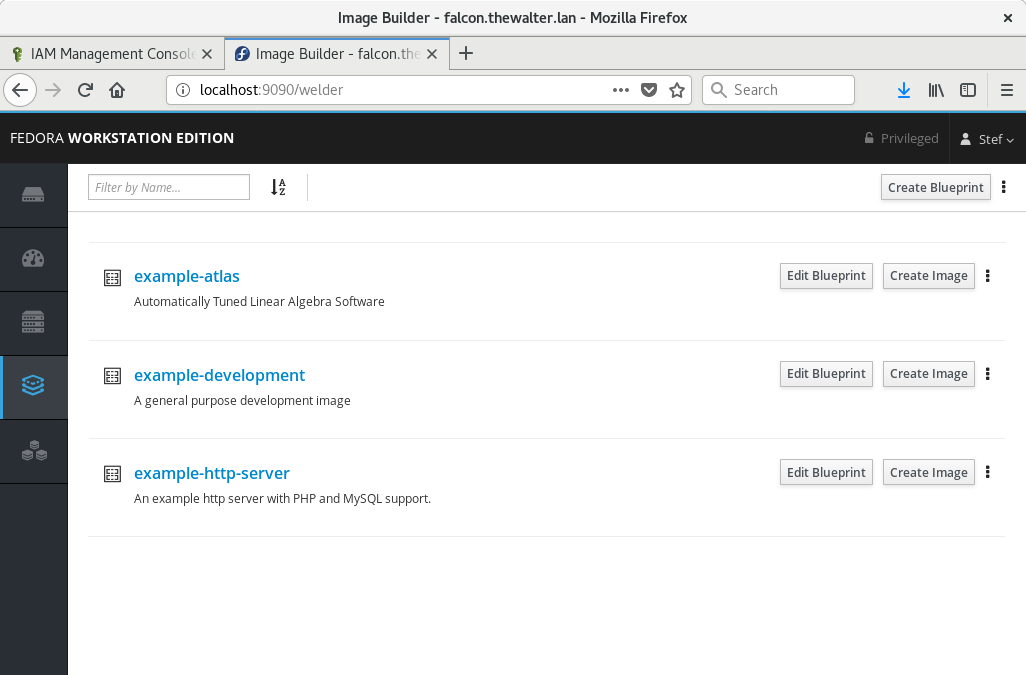
We first have to have a blueprint defined. This blueprint describes what goes into the image.
For the purposes of this example we’ll use the example-http-server blueprint, which
builds an image that contains a basic HTTP server.
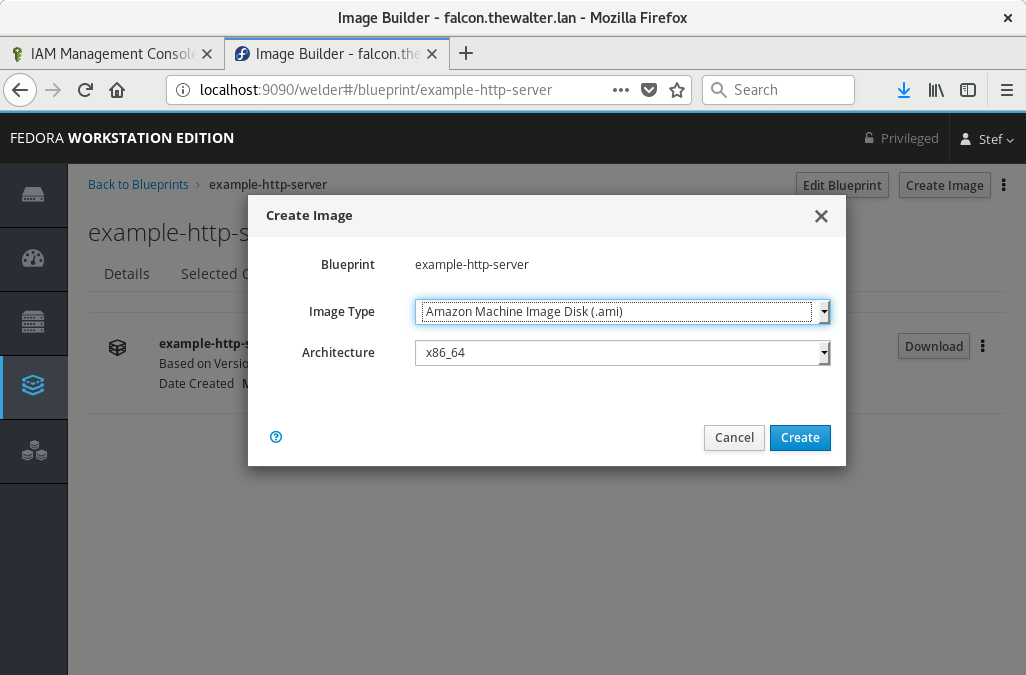
Click on the Create Image button and choose an image type from the dropdown to choose the Image Type:
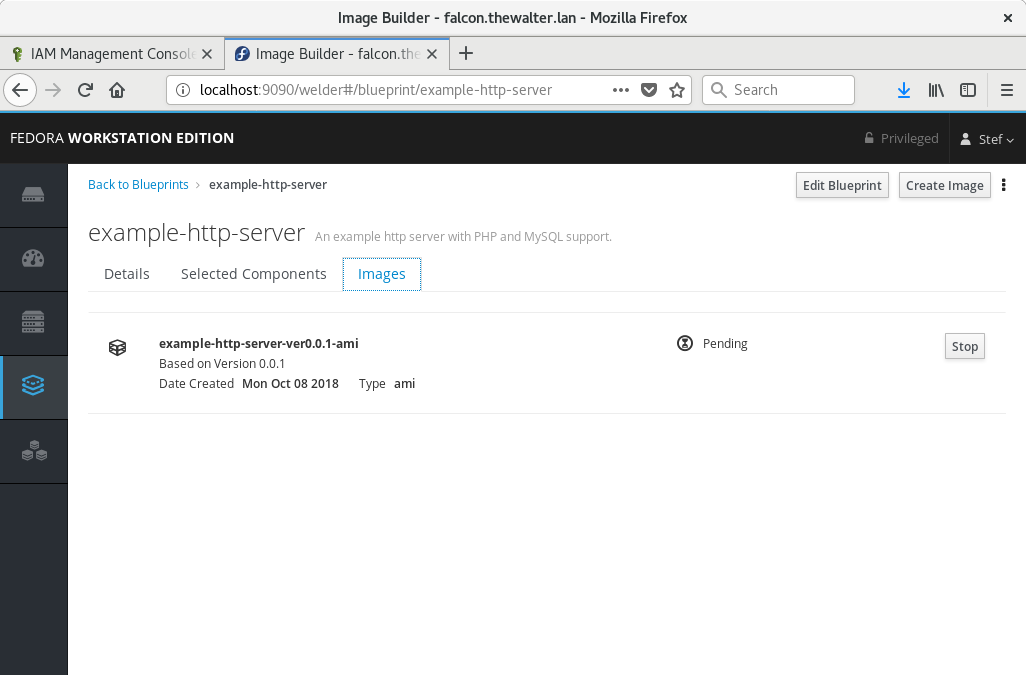
If you click on the blueprint, you should see progress described on the Images tab:
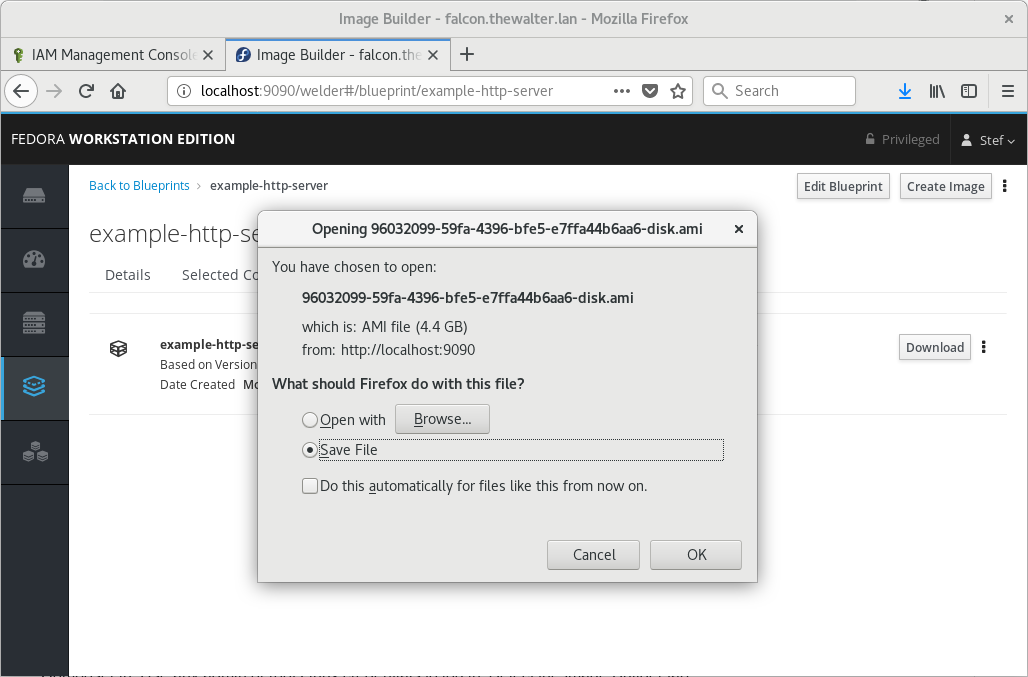
Once it’s done, download the image:
Compose an image from the CLI
To compose an image in Composer from the command line, we first have to have a blueprint
defined. This blueprint describes what goes into the image. For the purposes of this
example we’ll use the example-http-server blueprint, which builds an image that
contains a basic HTTP server.
We run the following command to start a compose. Notice that we pass the image type
of qcow2 which makes an image bootable in RHEV or KVM.
$ sudo composer-cli compose start example-http-server qcow2
Compose 8db1b463-91ee-4fd9-8065-938924398428 added to the queue
Now check the status of the compose like this:
$ sudo composer-cli compose status
8db1b463-91ee-4fd9-8065-938924398428 RUNNING  Mon Oct  8 08:11:33 2018 example-http-server 0.0.1 qcow2
In order to diagnose a failure or look for more detailed progress, see:
$ sudo journalctl -fu lorax-composer
...
When it’s done you can download the resulting image into the current directory:
$ sudo composer-cli compose image 8db1b463-91ee-4fd9-8065-938924398428
8db1b463-91ee-4fd9-8065-938924398428-disk.qcow2: 1460.00 MB